The Most Accurate Way to Measure a Man's Ring Size
A jeweller's rigid finger gauges provide the strongest starting point because they reproduce a circular metal opening. Ask the jeweller to use a gauge close to the width and inside profile of the ring you plan to buy. GIA quality-assurance guidance calls for wide-finger sizing gauges when a ring is wider than 4 mm. A narrow gauge can slide comfortably while the finished wide band feels tight.
Method 1: Use a Professional Finger Gauge
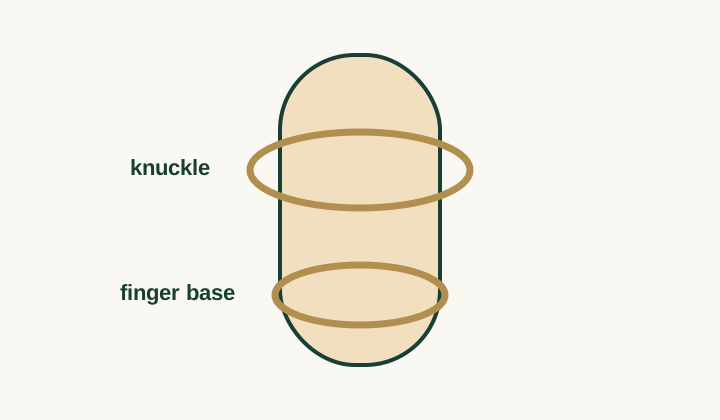
The gauge should pass the knuckle with slight resistance and sit at the finger base without pinching. Do not force it over the joint. Try the neighbouring half sizes and keep the gauge on briefly so you can notice pressure, spinning, or difficulty removing it. Tell the jeweller about swelling, arthritis, an enlarged joint, or work conditions that change your hands.
Method 2: Measure a Ring That Already Fits
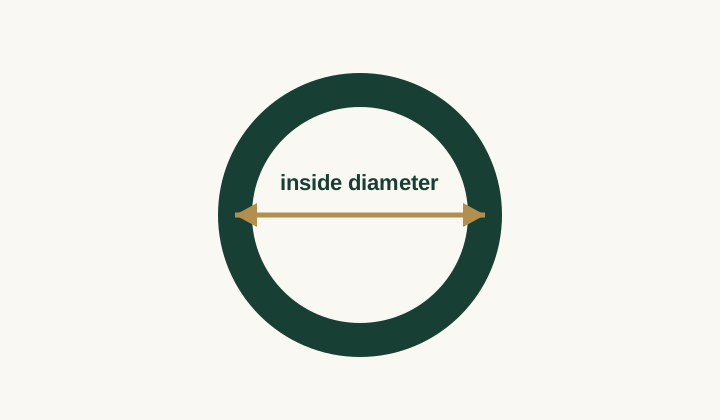
Choose a round ring worn on the same finger and hand. Place it flat and measure across the empty opening through the centre. A calliper gives a clearer tenth-of-a-millimetre reading than most rulers. Measure twice after rotating the ring. If the readings disagree, the ring may be oval and should be checked on a jeweller's mandrel.
Method 3: Use a Printable Ring Sizer
Print the tool at 100% or Actual Size. Turn off Fit to Page, then confirm the printed scale with a physical ruler before placing a ring over the circles or using a strip. A failed scale check invalidates every circle on the sheet. Our printable sizer includes a 50 mm check line for this purpose.
Why String and Paper Can Give the Wrong Size
String can stretch and settle into soft tissue. Paper can crease, overlap at an angle, or tighten as you mark it. Both differ from a rigid band, so use them only for an estimate. Keep the strip flat, mark one clean overlap point, and repeat the reading. If two results differ by more than about one millimetre, start again with fresh material.
Measure the Finger Base and the Knuckle
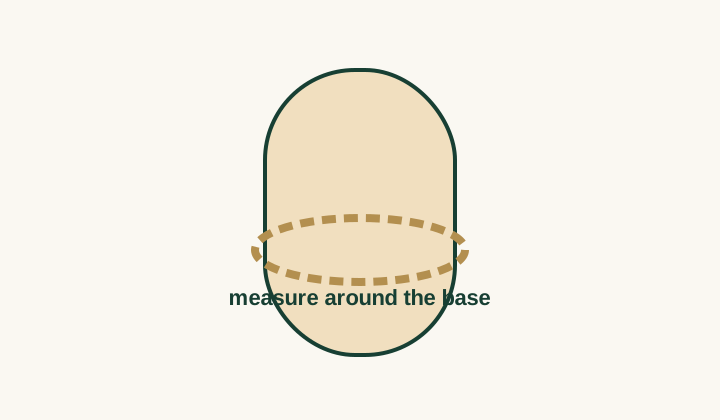
A ring has to clear the widest joint and remain secure below it. Measure both places when the knuckle is larger than the base. Choosing only the base size may trap the ring; choosing only the knuckle size may leave it spinning. A jeweller can assess half sizes, internal sizing beads, or a profile that balances passage and stability.
Choose the Correct Finger and Hand
Measure the exact finger that will wear the ring. Corresponding fingers on the left and right hand are not guaranteed to match, and a ring from the little finger cannot predict the ring finger. Record the hand, finger, measurement method, unit, date, and proposed band width so the number keeps its context.
How Temperature Changes Finger Size
Cold can make a finger temporarily smaller, while heat and recent activity can make it fuller. Wait until your hands return to an ordinary indoor temperature. Avoid making the final decision immediately after exercise, a hot shower, outdoor cold, or any episode of unusual swelling.
What Time of Day Should You Measure?
There is no universal clock time that captures every person's normal fit. Measure on more than one occasion, including a time when your hands feel typical and a later part of the day. The spread between readings tells you more than one carefully chosen number. Discuss a large variation with a jeweller.
How Many Times Should You Measure?
Take at least two readings during each session and repeat on another day. Independent measurements should cluster closely. Write down every result instead of remembering only the one you expected. With an existing ring, rotate it before repeating; with a paper strip, replace the strip so the first mark does not steer the second attempt.
How Wide Bands Affect the Final Fit
A wide band contacts more skin and often feels tighter than a narrow band of the same nominal size. Inside profiles also differ: a rounded comfort-fit interior may move over the joint differently from a flat interior. Do not apply a universal size adjustment. Ask the maker which gauge and allowance it recommends for the actual width.
What to Do When You Are Between Ring Sizes
Compare both neighbouring sizes under realistic conditions. The safer choice depends on knuckle shape, base width, band design, climate, and whether the ring can be resized. A slightly loose ring may accept a sizing aid; a tight full-eternity or hard-metal ring can be much harder to correct. Confirm the choice with the manufacturer.
Common Ring-Measuring Mistakes
Outside diameter includes metal and always overstates the opening. Other frequent errors include mixing inches and millimetres, reading a ruler at an angle, measuring a ring from another finger, printing with page scaling, pulling string tightly, and rounding before comparison. Label the measurement as diameter or circumference as soon as you record it.
When You Should Visit a Jeweller
Arrange professional sizing for a bespoke ring, a valuable stone setting, a wide band, a full-eternity design, a tension setting, hard-to-resize materials, or fingers with changing swelling. Bring an existing ring that fits and a picture or specification of the intended design. A competent fitting considers both the number and how the ring crosses the joint.
Men's Ring Measurement Checklist
Confirm the hand and finger. Note the intended band width and profile. Measure at a normal hand temperature. Test the base and knuckle. Repeat the reading on another day. Keep millimetres until the final conversion. Compare with the maker's chart. Check the exchange and resizing policy. For a high-cost order, finish with a professional gauge fitting.
Frequently Asked Questions
Can a phone measure ring size?
A phone can display a calibrated reference, but screen scaling and camera perspective can introduce error. Verify any on-screen tool against a physical ruler and confirm costly purchases with a rigid gauge.
Should a ring leave a mark?
A temporary light impression can occur, but pain, numbness, colour change, or a ring that cannot be removed safely requires attention. Remove the ring before swelling worsens and seek appropriate help if it is stuck.
How a Gauge Should Feel
A useful fitting is neither a loose pass nor a test of pain tolerance. The gauge should move over the knuckle with controlled resistance, settle without a pressure ridge, and come off with a small turn or pull. Wear it for several minutes and open and close the hand. A top-heavy sample that rotates, a band that pinches during a fist, or a gauge that needs force to remove provides information the number alone cannot show.
Matching the Gauge to the Finished Ring
Bring the design specification to the fitting. Record the width, thickness, inside profile, metal, stone coverage, and whether the ring will sit beside another band. A thin sample gauge does not reproduce a broad flat wedding band. GIA's guidance identifies 4 mm as the point above which a wide-finger gauge should be used. The maker may use its own fitting convention, so send the measured dimensions as well as the nominal size.
Measuring an Existing Ring with a Ruler
Use a ruler with clear millimetre marks and a high-contrast background. Align the inner edge with zero rather than the ruler's worn end. Find the centre visually and read the far inner wall. Take a photograph from directly above if you need to review the alignment, but do not infer scale from a photograph alone. The diameter chart explains how a tenth of a millimetre affects the comparison.
Working with a Digital Calliper
Clean the jaws and the ring before contact. Open the inside jaws within the ring and bring them outward until they touch without pressure. Lock the reading if the tool permits, remove it, and record the value. Repeat across a perpendicular axis. Callipers offer resolution, but an uncalibrated zero or excessive pressure still creates a precise-looking error. Close the clean jaws first and confirm that the display reads zero.
Planning for Stacked Rings
Two bands worn together cover more skin and can feel tighter than either ring alone. Measure while wearing sample bands of similar combined width when possible. Do not assume two narrow-band sizes will remain comfortable as a stack. Also consider whether the bands interlock, rub, or force each other toward a wider part of a tapered finger. Test the full arrangement before engraving or final manufacture.
Sizing Fingers with Changing Swelling
Record several readings with dates and conditions rather than chasing a single midpoint. Note ordinary variation and any episodes that make jewellery difficult to remove. A jeweller can discuss a fit that accommodates the observed range, but sudden, painful, or persistent swelling is not a sizing problem to solve with a larger ring. Remove restrictive jewellery and seek appropriate medical advice when symptoms warrant it.
Checking a Delivered Ring
Try the ring when the hand is at an ordinary temperature. It should clear the knuckle with deliberate but gentle movement and rest without pain, numbness, colour change, or a deep indentation. Check it again at another normal time before altering it. Keep packaging and observe the seller's return window. Engraving, resizing, or extended wear may end the option to exchange a poor fit.
Documenting the Final Size
Save more than “size 10.” Record US 10, 19.8 mm inside diameter, about 62.1 mm inside circumference, the hand and finger, the gauge width, and the maker. That note helps a future jeweller understand the conditions behind the label. If a later ring has a different width or profile, repeat the fitting rather than treating the old size as permanent.
Example: A Narrow Ring That Fits
A 4 mm ring measures 19.4 mm inside and fits the left ring finger. The proposed wedding band is 8 mm wide with a flat interior. The diameter identifies a useful reference near US 9.5, but copying the label ignores the new geometry. Take the reference ring to the jeweller, try an 8 mm gauge around the neighbouring sizes, and judge clearance over the knuckle. Record the final gauge and finished internal diameter on the order.
Example: A Large Knuckle
The base circumference reads 59.8 mm and the widest knuckle reads 63.5 mm. Those values point to different rows, so averaging them would hide the problem. The ring must pass the larger joint and remain steady on the smaller base. Try physical samples for removal and rotation. Discuss sizing beads, a spring insert, or a hinged solution with a jeweller who has inspected the finger and proposed design.
Example: Measurements Change Across Days
Readings of 61.9, 62.1, and 62.0 mm under ordinary conditions form a tight group. A reading of 64.0 mm after strenuous exercise describes a temporary condition and should be recorded separately. Use the normal cluster to choose trial gauges and confirm that the selected ring remains safe during expected variation. Do not order solely from the highest or lowest observation without understanding why it occurred.
Measuring for a Gift
A borrowed ring helps only when it is worn on the intended finger and hand. Measure its inside diameter, photograph the ruler alignment from above, and return the ring without altering it. If its use is uncertain, ask a trusted relative or choose an exchange-friendly design. A surprise does not justify claiming precision from a ring that may belong to another finger.
Final verification step
Take the final trial slowly. Put the sample on, remove it, wait a few minutes, and repeat. Confirm that ordinary hand movement does not create pain or uncontrolled spinning. Write the result beside the gauge width and intended design. That record is the useful outcome of the measuring process.
Sources and methodology
Dimensions are derived from inside circumference and rounded consistently. International labels are practical equivalents because national scales do not share every increment.