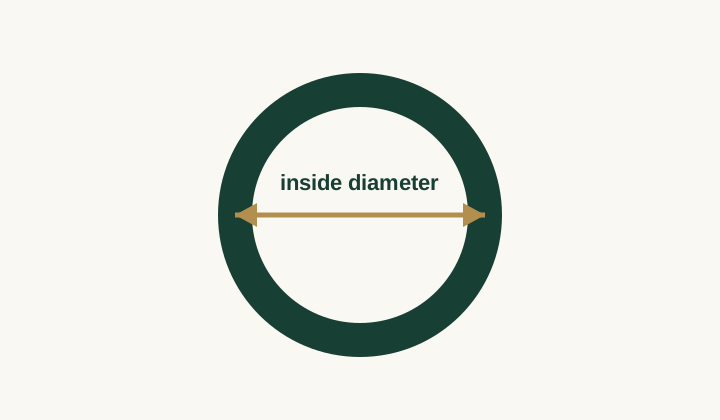
| US / Canada | Inside diameter |
|---|---|
| 3 | 14.1 mm (0.554 in) |
| 3.5 | 14.5 mm (0.570 in) |
| 4 | 14.9 mm (0.586 in) |
| 4.5 | 15.3 mm (0.602 in) |
| 5 | 15.7 mm (0.618 in) |
| 5.5 | 16.1 mm (0.634 in) |
| 6 | 16.5 mm (0.650 in) |
| 6.5 | 16.9 mm (0.665 in) |
| 7 | 17.3 mm (0.682 in) |
| 7.5 | 17.7 mm (0.698 in) |
| 8 | 18.1 mm (0.714 in) |
| 8.5 | 18.6 mm (0.731 in) |
| 9 | 18.9 mm (0.746 in) |
| 9.5 | 19.4 mm (0.762 in) |
| 10 | 19.8 mm (0.778 in) |
| 10.5 | 20.2 mm (0.795 in) |
| 11 | 20.6 mm (0.810 in) |
| 11.5 | 21.0 mm (0.826 in) |
| 12 | 21.4 mm (0.842 in) |
| 12.5 | 21.8 mm (0.858 in) |
| 13 | 22.2 mm (0.873 in) |
| 13.5 | 22.6 mm (0.890 in) |
| 14 | 23.0 mm (0.906 in) |
| 14.5 | 23.4 mm (0.922 in) |
| 15 | 23.8 mm (0.937 in) |
What Inside Diameter Means
Inside diameter is the straight-line distance across the widest part of a circular ring opening. The endpoints sit where the ruler meets the inner walls. The band thickness is excluded. This method works best when a ring already fits the same finger and hand that will wear the new ring.
Diameter is not finger width viewed from above. Fingers compress and change shape, while the inside of a sound ring gives a fixed circle that can be measured. Use circumference instead when you do not have a suitable ring.
How to Measure the Inside Diameter of a Ring
Place the ring flat on a light surface. Align the zero mark with one inner edge and read the opposite inner edge through the centre. Look straight down to avoid parallax. Repeat after turning the ring a quarter-turn. Matching readings suggest the ring is round; different readings may reveal an oval opening.
Ruler or Calliper?
A rigid metric ruler is widely available, but thick markings make tenths of a millimetre hard to judge. A digital calliper gives finer resolution and keeps its jaws against the inner edges. Apply light contact only. Forcing the jaws outward can scratch a ring or distort a thin band.
How Rounding Changes the Result
The table shows diameter to one decimal place and inches to three decimals. Keep the original reading until the comparison is complete. For example, 19.2 mm lies between the listed 19.0 mm and 19.4 mm values. Use the calculator to see which supported size is closer, then assess band width and knuckle clearance.
Measurement Examples
An opening close to 19.0 mm matches US 9 in this dataset. An opening close to 19.8 mm matches US 10. A 20.4 mm reading sits between US 10.5 and 11. These examples describe dimensions, not guaranteed fit; the original ring's profile and the new ring's width can change the feel.
Errors That Produce the Wrong Diameter
Measuring the outside edge, measuring at an angle, choosing a ring worn on another finger, or using a bent ring can all shift the result. Decorative openings and hinged rings may not represent a round internal circumference. Use the full measuring guide if any of these apply.
Confirm Before Ordering
Compare the measurement with the seller's chart. When the ring is costly or difficult to resize, take the existing ring to a jeweller. They can place it on a calibrated mandrel and account for unusual profiles without guessing from a single ruler reading.
Choosing the Right Reference Ring
The best reference is round, comfortable, and worn on the intended finger and hand. Avoid an open, adjustable, hinged, or visibly distorted band. A ring that fits only in winter or leaves a painful mark is poor evidence. Note its width and interior shape so you can explain why a new design may need a different final size.
Reading Tenths of a Millimetre
US half-size steps in this chart change diameter by roughly 0.4 mm. A ruler marked only in whole millimetres demands careful interpolation; a calliper makes the decimal easier to see. Record 19.4 mm rather than rounding immediately to 19 or 20. The closest-size calculation should use the unrounded observation.
From Diameter to Circumference
For a mathematical circle, circumference equals diameter multiplied by pi. A 19.0 mm diameter therefore gives about 59.7 mm by calculation, close to the 59.5 mm table value for US 9. Small differences arise from rounded published dimensions. Use one shared chart consistently rather than mixing a calculated column from one source with labels from another.
Measuring Rings with Stones or Settings
A setting does not change the geometric opening, but it can prevent the ring from lying flat. Support the band so the opening faces the measuring surface squarely. Top-heavy rings may also rotate on the finger after sizing. A jeweller can check both the opening and balance before you copy the size into a new design.
Oval and Damaged Rings
Two perpendicular diameter readings expose an oval. Do not average them and call the result a ring size; the circumference of an ellipse is not captured by that shortcut, and the ring may need repair. A mandrel reading by a jeweller is more appropriate after roundness has been restored.
Communicating the Result to a Seller
Send the nominal size and the measured diameter: “closest to US 9.5; reference ring inside diameter 19.4 mm.” Mention the reference band width and the intended band width. This gives the seller a chance to reconcile its production chart with your evidence rather than relying on a bare regional label.
Example: 18.1 mm
A round reference ring reads 18.1 mm on two perpendicular axes. The diameter table matches US 8, with a listed circumference of 57.0 mm. If the new ring is similar in width and profile, this is a strong starting point. If it is much wider, try a representative gauge. Do not add an automatic half size without the maker's guidance.
Example: 20.0 mm
A 20.0 mm opening falls between the 19.8 mm row for US 10 and 20.2 mm for US 10.5. The numerical gap is equal. The calculator should report a nearest supported row, but the tie cannot decide fit. Test both physical sizes, paying attention to knuckle clearance, base stability, and the planned band width.
Metric Ruler Setup
Tape the ruler flat so it cannot slide. Place the ring beside, not on top of, a thick bevelled ruler edge if that edge prevents a clear view. Align the opening through the centre and use diffuse light to remove shadows. Write down the value before moving the ring. Then rotate it and repeat independently.
Calliper Safety
Use plastic jaw covers or professional help for a delicate, plated, antique, or soft-metal ring. Never force metal jaws against gemstones, prongs, engraving, or a fragile interior finish. The goal is light contact with opposite inner walls. Damage prevention is more valuable than gaining another decimal place at home.
Diameter Is Not Band Width
Inside diameter crosses the opening. Band width runs along the finger from one edge of the band to the other. Band thickness measures from the interior surface outward. Keep these three dimensions separate in notes and seller messages. Mixing width with diameter can produce an order far outside the supported range.
Final verification step
When two people take the reading, agree on the endpoints before comparing results. One may align with the outside wall while the other uses the opening. Point to the inner edges and record the tool resolution. If the readings differ by more than a few tenths of a millimetre, repeat under better light or ask a jeweller to use a mandrel.
Do not scale diameter from a screen photograph. Image resizing, lens perspective, and unknown reference dimensions make the apparent opening unreliable. A physical ruler in the photo helps document alignment but does not replace measuring the real ring.
A ring with an open back, flexible shank, or irregular interior may lack one meaningful circular diameter. Contact its maker for the intended sizing method. Forcing such a design into a standard circle comparison can produce a confident number that does not describe how it contacts the finger.
Once a diameter is established, retain millimetres throughout the purchase. Convert to inches only for a seller that requires them, and provide at least three decimal places. Confirm the seller has interpreted the number as inside diameter.
Special ring shapes need a different check
A conventional diameter chart assumes a round, unobstructed opening. Thick liners, interior channels, hinged shanks, and mechanical parts may change the area that contacts the finger. Ask the maker which internal dimension governs the fit rather than selecting a visible outside edge.
Old paperwork may record a regional label without the system or show the size before a later repair. A new finger fitting is stronger evidence than reconstructing diameter from a photograph. When the original ring exists, have a jeweller check its roundness and mandrel size. A retailer may ask for circumference instead; provide the chart value derived from the same dataset and keep the original diameter in the message. Do not combine a diameter from one chart with a circumference from another. When precision affects a custom order, ask the maker which single measurement it will use for production and have that value acknowledged in writing. Keep the measuring tool square to the opening.
Diameter checks for difficult rings
How bevelled edges affect a reading
Some rings have a rounded or bevelled inner edge. A calliper may touch closer to the centre than a ruler viewed from above, and the point of contact can change the decimal reading. Do not press the jaws into the curve. Record the narrowest clear opening that the finger must pass, note the interior profile, and ask the maker how its production chart defines diameter. For custom work, a jeweller can compare the ring on a mandrel instead of forcing a household tool to resolve the geometry.
Measuring a wide reference ring
A wide reference band can rock on a flat surface, which moves the apparent centre line. Support it so the opening faces the ruler squarely and take the measurement through the middle of its depth. Compare the proposed ring's width and profile with the reference. A diameter that reproduces one wide comfort-fit ring may not feel identical in a flat interior. Test representative gauges across the neighbouring sizes rather than adding a fixed numerical allowance.
Checking a measurement before an expensive order
Write the raw calliper or ruler reading, tool resolution, date, ring width, hand, and finger. Ask another person to repeat the setup without seeing your result. Close agreement is useful; disagreement means the method needs attention. Send the seller the inside diameter and the nearest nominal size, then ask which figure it will use to manufacture the ring. Retain the written answer until the ring has been tried and accepted.
Reading an inch ruler accurately
A fractional inch ruler is harder to compare with a decimal chart. Convert the smallest marked fraction first, keep the full decimal, and then multiply by 25.4. For example, 25/32 inch equals 0.78125 inch, or about 19.84 mm. That sits close to the 19.8 mm US 10 row in this dataset. Do not round the original fraction to 0.8 inch; that would become 20.32 mm and could shift the recommendation.
Comparing several reference rings
If two comfortable rings for the same finger have different inside diameters, compare their widths, profiles, and current roundness before choosing one as the reference. Wear each under normal conditions and note which stays secure without pressure. A jeweller can place both on a mandrel and explain whether wear, deformation, or design accounts for the difference. Send the new maker the diameter of the stronger reference, the neighbouring reading, and the proposed band specification. This documents the uncertainty instead of hiding it behind a single label.
What the chart cannot detect
The chart cannot see an oval ring, a dent, a thick liner, a sprung shank, or an opening partly blocked by mechanical parts. It also cannot know whether the reference ring fits well today. Inspect the object and the finger before treating its number as evidence. When the construction is irregular, ask the manufacturer for the correct sizing procedure and use a jeweller familiar with that design.
Finish by comparing the measured opening with a similar-width physical gauge. Record the successful gauge, raw diameter, finger and hand before authorizing manufacture.
`r`nSources and methodology
Dimensions are derived from inside circumference and rounded consistently. International labels are practical equivalents because national scales do not share every increment.