| US / Canada | Inside circumference |
|---|---|
| 3 | 44.2 mm (1.740 in) |
| 3.5 | 45.5 mm (1.791 in) |
| 4 | 46.8 mm (1.843 in) |
| 4.5 | 48.0 mm (1.890 in) |
| 5 | 49.3 mm (1.941 in) |
| 5.5 | 50.6 mm (1.992 in) |
| 6 | 51.9 mm (2.043 in) |
| 6.5 | 53.1 mm (2.091 in) |
| 7 | 54.4 mm (2.142 in) |
| 7.5 | 55.7 mm (2.193 in) |
| 8 | 57.0 mm (2.244 in) |
| 8.5 | 58.3 mm (2.295 in) |
| 9 | 59.5 mm (2.343 in) |
| 9.5 | 60.8 mm (2.394 in) |
| 10 | 62.1 mm (2.445 in) |
| 10.5 | 63.4 mm (2.496 in) |
| 11 | 64.6 mm (2.543 in) |
| 11.5 | 65.9 mm (2.594 in) |
| 12 | 67.2 mm (2.646 in) |
| 12.5 | 68.5 mm (2.697 in) |
| 13 | 69.7 mm (2.744 in) |
| 13.5 | 71.0 mm (2.795 in) |
| 14 | 72.3 mm (2.846 in) |
| 14.5 | 73.6 mm (2.898 in) |
| 15 | 74.8 mm (2.945 in) |
Finger Circumference and Ring Circumference
Finger circumference is the distance around the finger where the ring rests. Ring circumference is the distance around the inside of the finished ring. A sizing chart compares the first measurement with the second, but skin compresses while metal does not. That is why a paper measurement is an estimate rather than a perfect physical model.
How to Record a Circumference Measurement
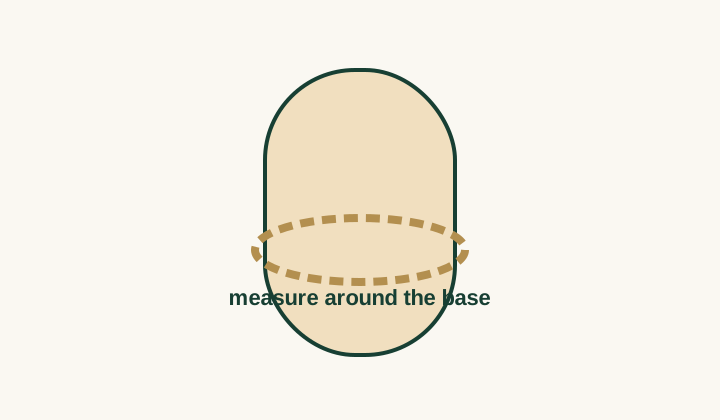
Wrap a narrow, non-stretch strip around the base of the intended finger. Keep it flat and comfortably snug. Mark one clean overlap point, lay the strip straight, and read the length in millimetres. Repeat at least twice and discard a reading if the strip twisted or slid toward the knuckle.
Record the raw value before consulting the chart. If you look at expected sizes while measuring, it is easy to tighten the strip until it reaches a familiar number. Independent repeated readings provide a better check.
Measure the Knuckle Too
If the knuckle is visibly wider than the finger base, measure both places. A ring must pass the joint and still sit securely at the base. A jeweller can balance those requirements with half sizes, a different band profile, or sizing aids. Do not choose the base measurement alone when it would trap the ring below the knuckle.
Examples in Millimetres and Inches
A circumference near 57.0 mm corresponds to US 8 in this table; 59.5 mm corresponds to US 9; and 62.1 mm corresponds to US 10. In inches, those values are about 2.244, 2.343, and 2.445. Keep three decimal places when entering inches so conversion rounding does not choose the wrong neighbour.
What to Do Between Sizes
Use the calculator to identify the nearest listed value, then compare the sizes on either side. A wider band generally needs more room than a narrow one, but the maker's profile and comfort-fit design also matter. Ask the seller which gauge matches the ring being ordered.
Temperature, Activity, and Timing
Fingers can be temporarily larger after heat, exercise, salty food, or fluid retention and smaller in cold conditions. Measure on more than one occasion under ordinary indoor conditions. A reading taken immediately after coming in from cold weather should not decide an expensive purchase.
When Circumference Is the Wrong Method
Paper measurement is weak when dexterity is limited, finger shape is unusual, swelling varies substantially, or the proposed band is very wide. A professional gauge provides a rigid shape and can be matched to the band width. An existing ring may also offer a better result; see size by inside diameter.
Use the Number as Evidence, Not a Guarantee
Compare your repeated measurement with the retailer's chart and exchange policy. Confirm the fit professionally for a bespoke ring, full-eternity design, tension setting, tungsten band, or another piece that may be difficult to alter after manufacture.
Selecting the Measuring Material
Use a narrow flexible tape designed for body measurements or firm non-stretch paper. Thick cardboard will not follow the finger; sewing thread can pull into the skin; elastic material changes length under tension. A rigid finger gauge remains more representative of a metal ring, so use home materials to estimate and cross-check.
Keeping Tension Consistent
The strip should touch the skin without compressing it. Mark the overlap while the finger remains relaxed. If the mark moves when you release your grip, the strip was under tension. Repeat with a new strip and compare. Consistency across attempts matters more than forcing a number to line up with a chart row.
Converting Centimetres and Inches
Multiply centimetres by 10 to get millimetres. A 6.2 cm reading is 62 mm, close to US 10 in this dataset. Multiply inches by 25.4; 2.44 inches is 61.98 mm. Keep the decimal until after matching. Confusing 6.2 cm with 6.2 mm or rounding inches to one decimal creates an obviously wrong result.
Tapered Fingers
On a finger that widens steadily toward the hand, the ring may slide toward a tighter area or rotate if left loose. Mark where the ring should rest and measure there. Test a sample band of similar width through normal hand movement. A heavy top can require stability that the circumference number does not predict.
Large-Joint Decisions
Record both the base and widest knuckle circumference. If the difference is substantial, the nearest chart row for the base may not pass the joint and the knuckle row may spin below it. Professional options can include sizing beads or a hinged shank. Those choices depend on the ring and should not be improvised from a web chart.
Recording a Measurement Range
A set of 61.8, 62.0, and 62.1 mm under ordinary conditions is a coherent cluster. Readings of 59, 62, and 65 mm indicate a method or condition problem. Repeat later and note temperature, activity, and swelling. Share the range with the jeweller rather than hiding the variation in an average.
Example: 59.5 mm
Two comfortable measurements at the finger base read 59.4 and 59.6 mm. The shared chart centres on 59.5 mm for US 9. Measure the knuckle next and test a similar-width gauge. The close numerical match supports the trial size, but it cannot account for a wider proposed band or a ring that carries a heavy top.
Example: 63.9 mm
A 63.9 mm reading lies between US 10.5 at 63.4 mm and US 11 at 64.6 mm, slightly closer to 10.5. Repeat the measurement with consistent tension. If the band is wide or the knuckle requires more room, compare both sizes physically rather than treating the 0.5 mm difference as a complete recommendation.
Finger Versus Ring Circumference
A ring's inside circumference is the path around a rigid opening. A strip around a finger follows compressible skin and may not form a perfect circle. The values can still be compared for estimation, but the materials behave differently. A rigid gauge supplies a more realistic test of movement over the knuckle and pressure at the base.
Marking the Overlap
Use a fine pen and draw one line across both layers at the overlap. After removing the strip, measure from the starting edge to that line. A thick mark creates uncertainty; record its centre consistently. If the paper slides while marking, discard it. Do not trim the strip to an expected chart number.
When to Stop Measuring at Home
Stop and seek professional help if repeated values spread widely, the joint is painful, the finger swells unpredictably, or a ring has previously become stuck. Home sizing should not require force or prolonged compression. A jeweller can test rigid samples and discuss designs suited to the observed anatomy.
Final verification step
A second person can mark the overlap while the wearer keeps the hand relaxed. This reduces the tendency to tighten the strip while reaching for a pen. Compare both people's readings and repeat if they disagree. The method remains an estimate because paper does not reproduce rigid metal.
For a band worn beside another ring, measure and test the combined width. The circumference chart supplies a base conversion, while stacked contact changes comfort and movement. Bring both rings, or samples of both widths, to a professional fitting.
Do not keep a strip wrapped for a long period or pull it tighter to stop it moving. The skin should retain normal colour and sensation. Remove any measuring material immediately if it causes discomfort.
Write “finger circumference” beside the result. This prevents a 62 mm value from later being mistaken for diameter. Add the date, finger, hand, and conditions. Compare the retailer's stated circumference before ordering and request clarification when its size label disagrees.
Match the material to the job
A wide soft tape can bridge the finger, while thread can sink into the skin. Use a narrow, stable strip and keep it perpendicular to the finger. A mirror or a second person can reveal a loop that climbs diagonally toward the knuckle.
Open and adjustable shanks still have structural and comfort limits. Ask the maker whether its design uses a standard circumference size. Do not repeatedly bend a valuable adjustable ring to imitate different sizes; follow its adjustment instructions and confirm fit professionally. If the paper overlaps unevenly because the finger is tapered, mark the intended resting position and repeat with a rigid gauge. Compare the result after normal hand movement. A circumference that works only while the hand is held still does not establish a secure everyday fit. Record the stable value only after repeating the process.
Circumference checks for difficult fingers
Choosing the strip width
Use a strip narrow enough to lie flat but stiff enough not to stretch or cut into the skin. A very wide tape can bridge a tapered finger and read larger; thread can sink into tissue and read smaller. Keep the loop perpendicular to the finger. Check from more than one angle or ask another person to confirm that it has not climbed toward the joint while you mark the overlap.
Separating ordinary variation from error
Three readings taken minutes apart should cluster closely when tension and placement stay consistent. If one value differs by several millimetres, do not average it into the others. Identify whether the strip slipped, twisted, or tightened. Repeat later under normal indoor conditions and save the individual values. A clear range helps a jeweller choose trial gauges; a single averaged number can hide a bad attempt.
Measuring for a wide band or stack
Finger circumference identifies a starting row, but it does not model the pressure of a broad band or several rings worn together. Bring the proposed total width to a fitting and use gauges or sample bands that cover a similar area. Check the stack while bending the finger and during ordinary hand movement. The adjustment depends on width, inside profile, finger shape, and manufacturer, so no universal half-size rule applies.
Working around a prominent joint
Measure the intended resting place and the widest part of the knuckle separately. Label both readings. The base figure may create a ring that cannot pass the joint, while the knuckle figure may leave it rotating below. Physical samples reveal the trade-off. A jeweller may discuss sizing beads, a spring insert, or a hinged design after seeing the finger and ring; a circumference chart cannot select those options remotely.
Cross-checking circumference with a trial ring
After the chart identifies a starting size, try a rigid sample with a similar width. The sample should cross the knuckle with controlled resistance and rest without pinching or uncontrolled rotation. Repeat the trial when the hand is at another ordinary temperature. If the physical result contradicts the strip, trust the representative gauge and review the paper technique. Record both the circumference and the successful gauge so the manufacturer can see which evidence came from flexible material and which came from a metal opening.
Recording centimetres without confusion
A value written as 6.2 is ambiguous unless the unit is attached. If the strip reads 6.2 cm, record 62.0 mm before using the table. Keep “finger circumference” beside it so the value is never mistaken for diameter. Add the hand, finger, conditions, and band width. Clear notes prevent a later seller from applying the correct number to the wrong measurement type.
A final trial should use a rigid sample close to the proposed width and profile. Check removal over the knuckle, stability at the base and comfort during ordinary hand movement. Record the circumference beside the successful gauge rather than keeping only the nominal label.
`r`nSources and methodology
Dimensions are derived from inside circumference and rounded consistently. International labels are practical equivalents because national scales do not share every increment.